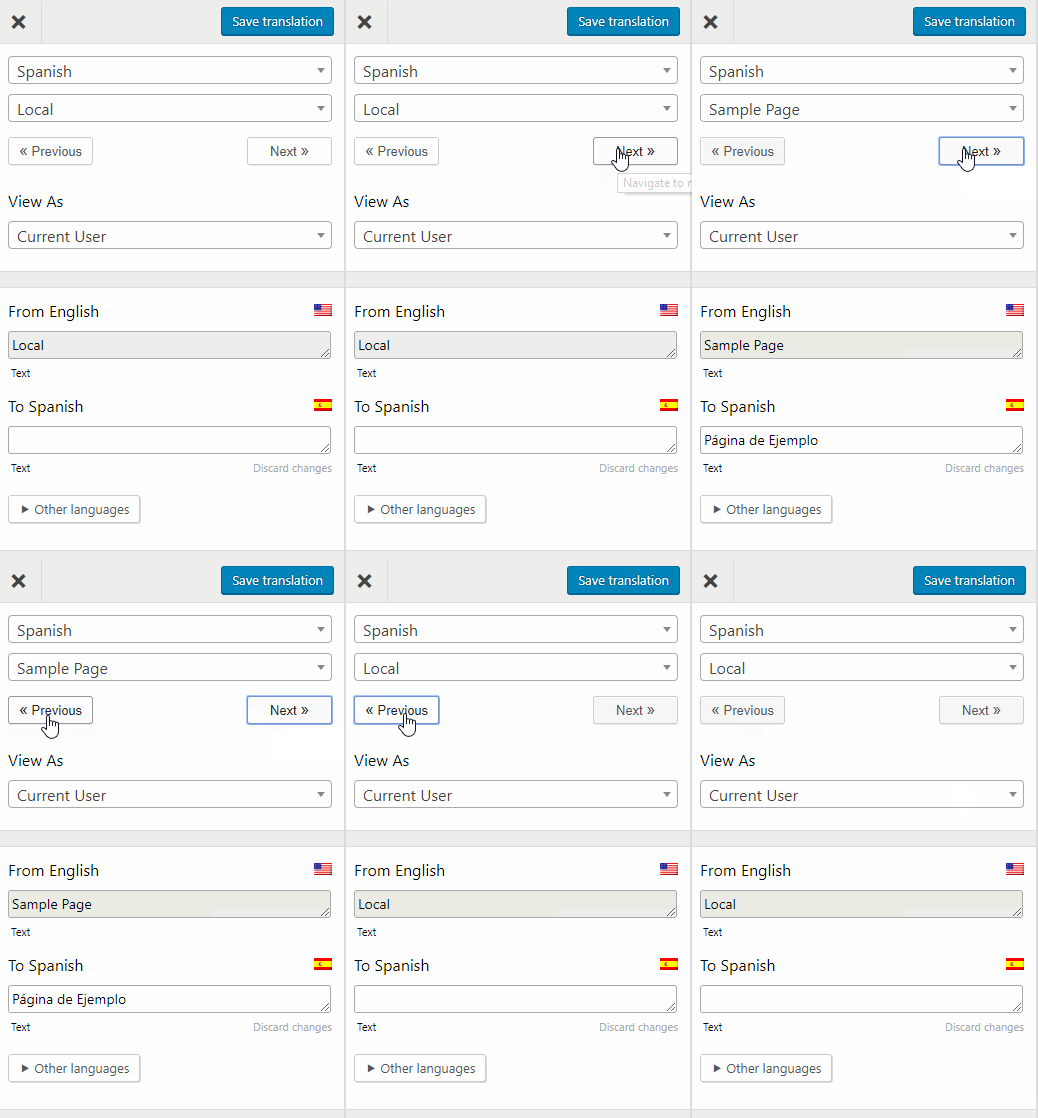
Translation Editor
The Translation Editor can be accessed from both the Settings page or from the Admin bar.
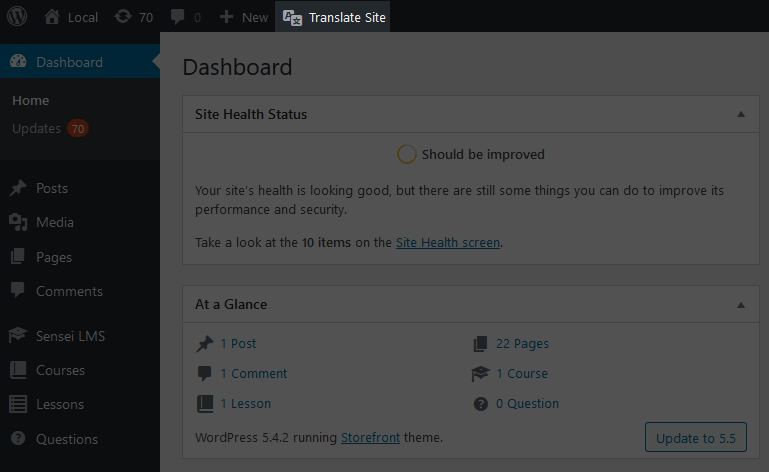
Normally, you can access it from the WordPress Admin Bar -> Translate Site button.
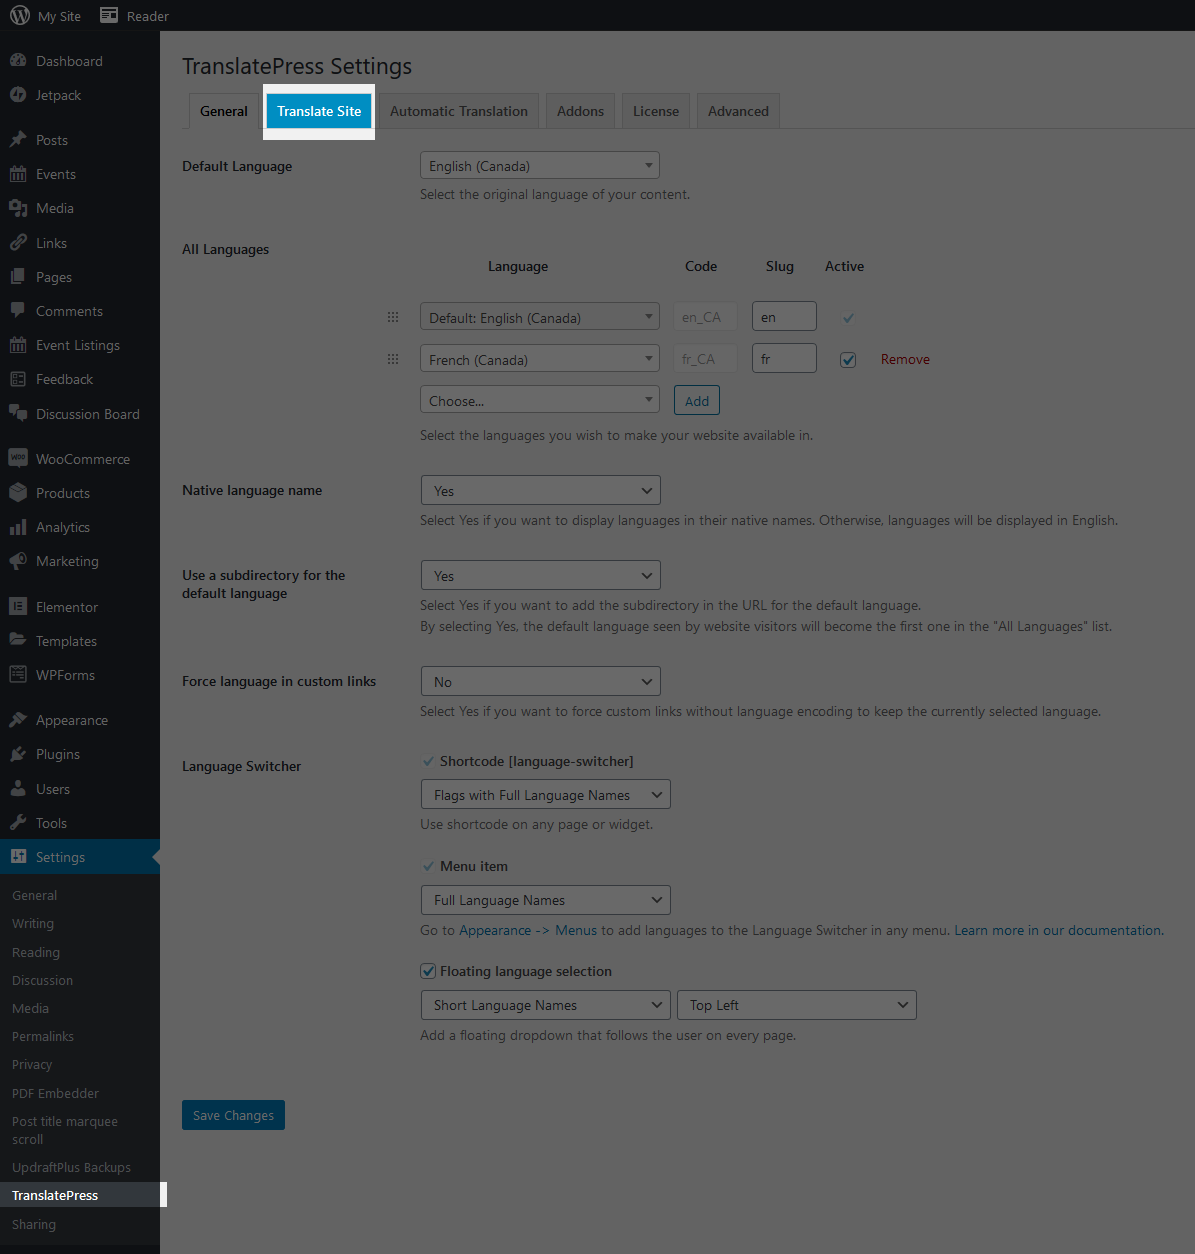
If the Admin Bar is not available (for example, wordpress.com hosting replaces the default admin bar with it’s own), you can access it from WordPress -> Settings -> TranslatePress -> Translate Site.
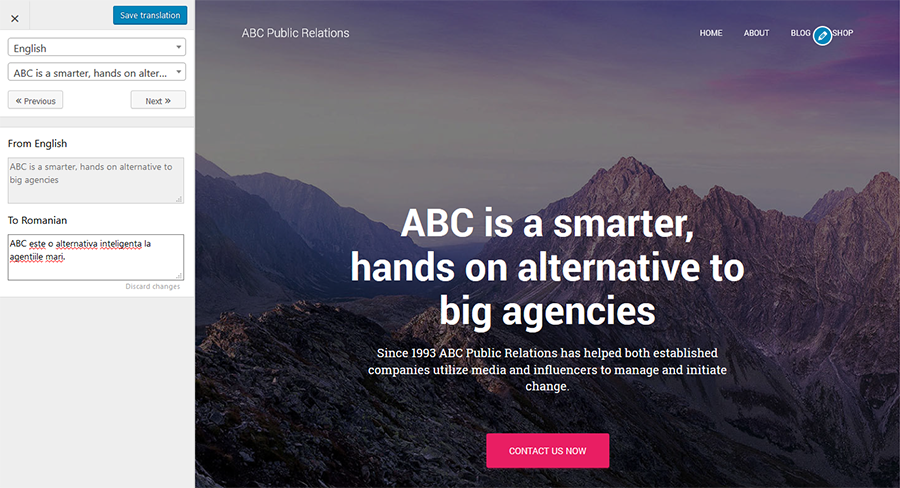
It’s a simple interface that allows you to translate your website page by page.
Edit visible text
The main functionality of the translation editor is the possibility to translate string by string your entire page.
Simply hover over a string, click the edit button ![]() that appears on the left and translate your string in the left translation interface.
that appears on the left and translate your string in the left translation interface.
Changing language
Selecting a new language will allow you to navigate your site in that particular language, making it a lot easier to notice untranslated strings.
Search for a string
Not all detected string are visible in the page. Strings like SEO Title, meta description and sometimes other strings that don’t have a the edit button ![]() can be found by simply searching the list of strings.
can be found by simply searching the list of strings.
Browse As
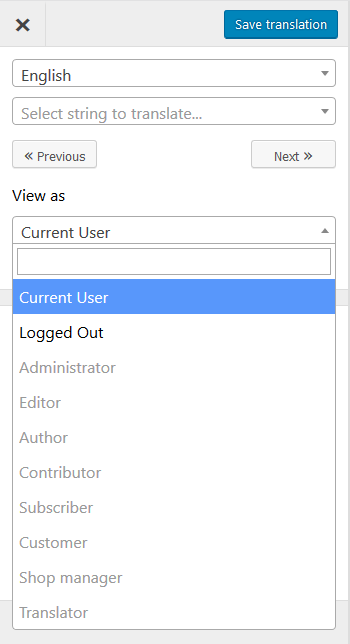
You can Browse your website from the translation editor as your self (logged in) or as a non-logged in user. This makes it easy to translate pages that are dynamic based on the logged in / non-logged-in status.
You can navigate as a different user role with the Browse as Role Addon.
Translate SEO elements
The SEO Addon is only available in the paid versions of the plugin.
Using this addon you can translate all the SEO elements from every page:
- URL post/page/custom post type slug
- page title
- page description
- image alt tag
- Facebook and Twitter title and descriptions (these are usually added by your SEO plugin and appear when users share your content)
To translate the above, choose them from the string list under Meta Information.
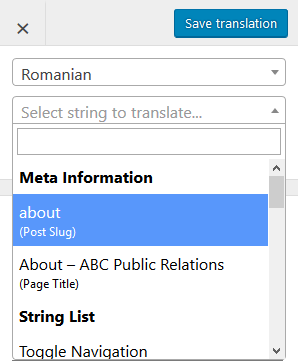
TranslatePress works out of the box with all SEO plugins.
Using the SEO Pack addon, TranslatePress will extend the sitemaps functionality added by SEO plugins and automatically create a multilingual sitemap that includes all your translated content.
Multilingual Sitemap support is added for the most popular SEO plugins:
- Yoast
- Rank Math
- SEOPress
Having these important SEO elements translated, as well as creating a multilingual XML Sitemap will have a major impact on your site ranking into multiple languages.
Translation Blocks
To translate larger blocks of html with a single translation you need to join multiple translation strings into a translation block.
Merging a string with its parent paragraph is done by hovering a string that you want to join with its surrounding strings within the parent. Click the merge button ![]() shown for the hovered string.
shown for the hovered string.
The block that will be merged is now highlighted in the live preview. The full text containing the HTML structure, is now shown in the left sidebar where you can optionally add a translation. Click the Save Translation button to confirm the creation of the translation block.
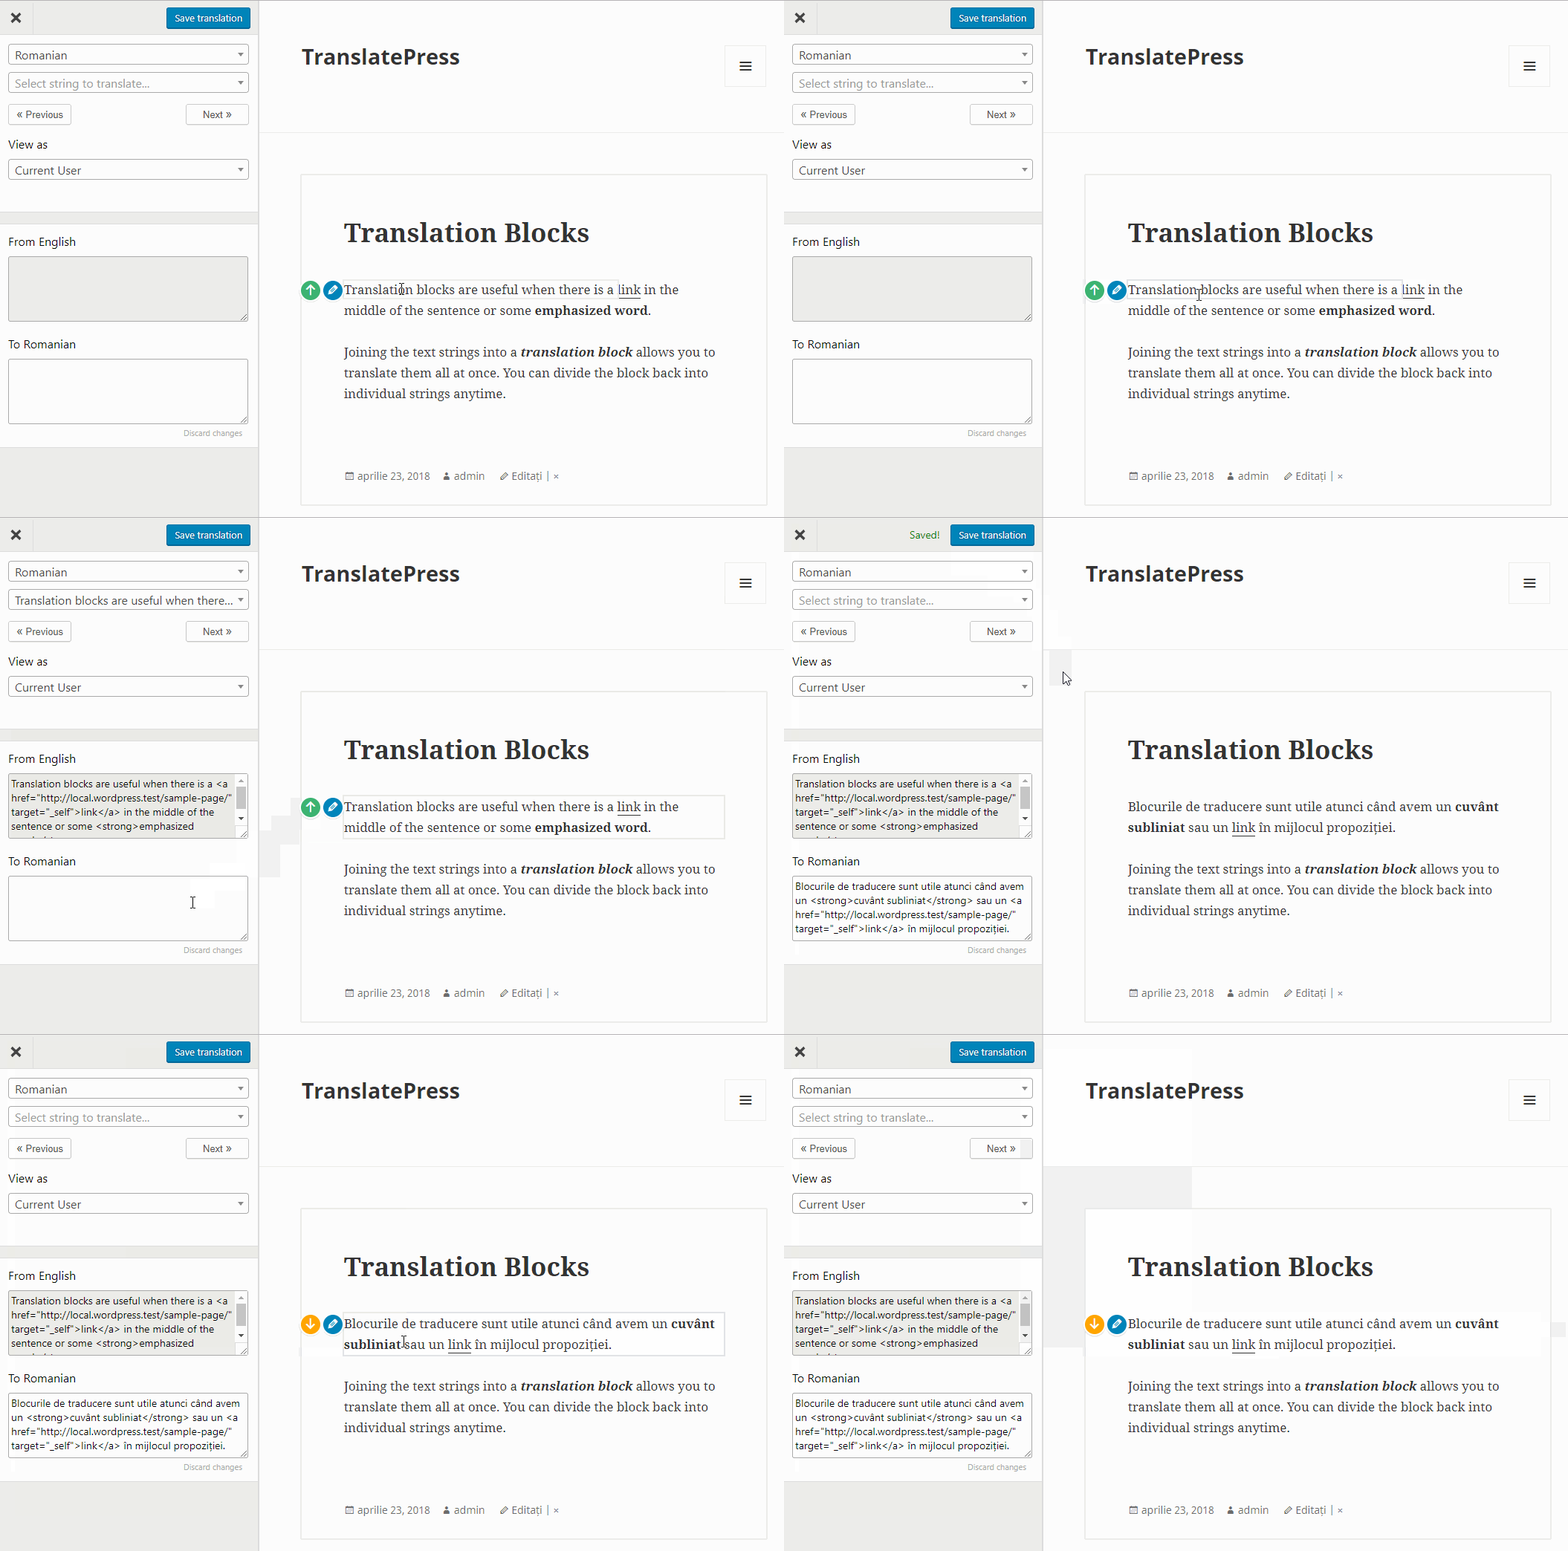
Now the translation block will be translated as a whole. You can edit the translation by clicking the Edit button ![]() . When writing a translation for the translation block, be careful to insert a valid HTML in the translation block.
. When writing a translation for the translation block, be careful to insert a valid HTML in the translation block.
Note: The merging icon will be available only to the strings compatible with translation blocks. Merging is allowed within block elements such as paragraphs and divs. Content received through wp-ajax requests is also compatible.
The translation block is not compatible with Gettext strings or strings dynamically inserted with JavaScript.
To go back to translating individual strings from a created translation block you need to hover it and click the Split button ![]() . A pop-up will appear asking you to confirm separating the translation block into smaller pieces. The translation of the whole translation block will be available anytime you decide to merge back again.
. A pop-up will appear asking you to confirm separating the translation block into smaller pieces. The translation of the whole translation block will be available anytime you decide to merge back again.
You can also specifically select any html block to be translated as a whole by adding the class ‘translation block’ to it. For example:
<div class="translation-block">
   Translate <em>everything</em> <div>inside</div>
</div>
Image translation
With TranslatePress you can show different images for each language of your website.
To do this just click the ![]() button corresponding to the image you want to translate or select the image by name from the dropdown of strings under Images option group.
button corresponding to the image you want to translate or select the image by name from the dropdown of strings under Images option group.
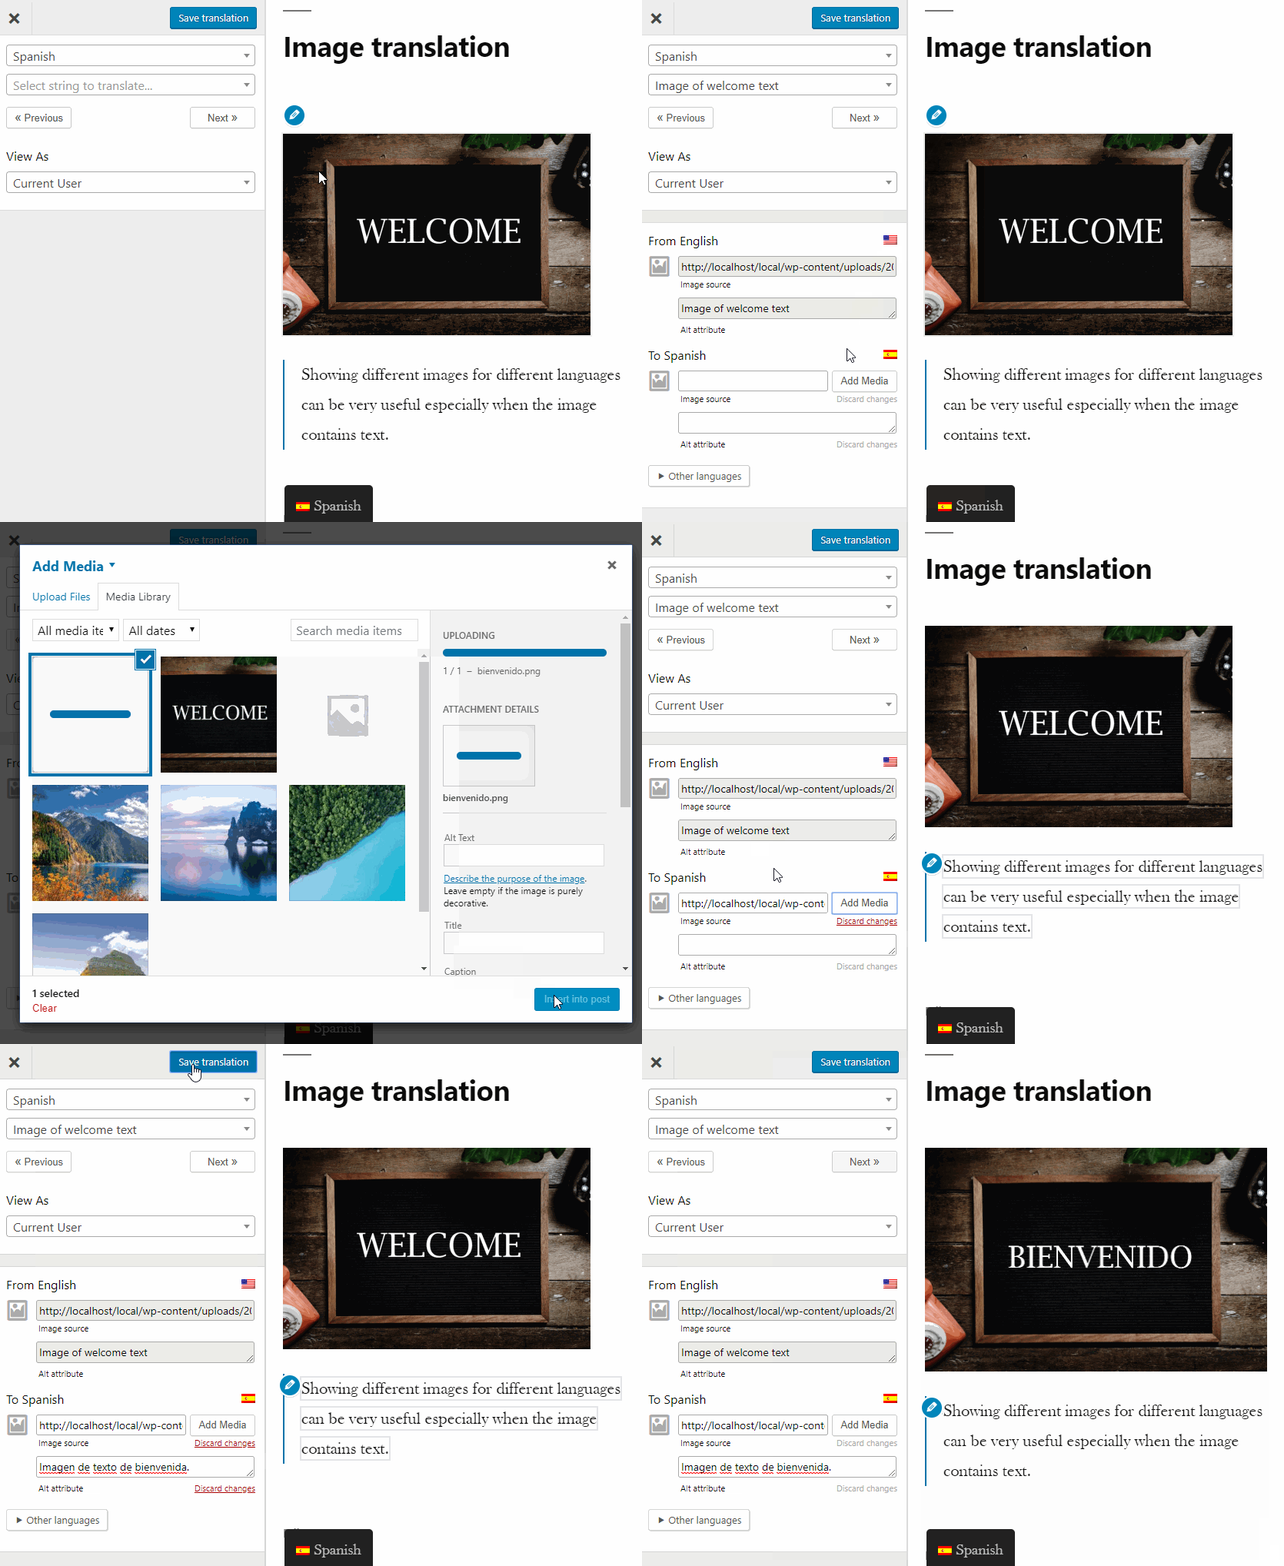
In the left sidebar you can use the Add Media button to upload a new image or select one from the Media library. You can also just type the url of the translated equivalent of the original image in the text box.
Beside the image source, you can also translate all the existent associated meta information such as the alt attribute and title attribute. If the image is inside an anchor pointing to its larger version of the image for example, you will be able to translate the href attribute of the anchor.
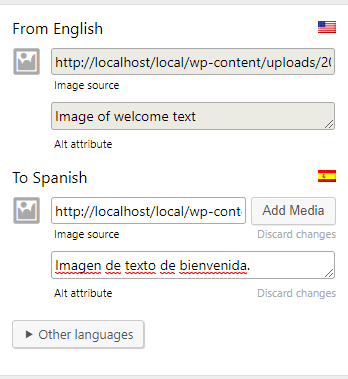
All the translatable meta information associated with the image will be shown together with the image source in the sidebar.
Note: To translate the alt attribute you will need the SEO Add-on which is only available in the paid versions of the plugin.
Image slider translation
To translate an image slider or an image carousel, you simply need to hover over the images displayed and click ![]() for each image you want to replace when viewing in a different language.
for each image you want to replace when viewing in a different language.
Translating the alt attribute and all the other meta information can be done from the left sidebar of the Translation Editor.
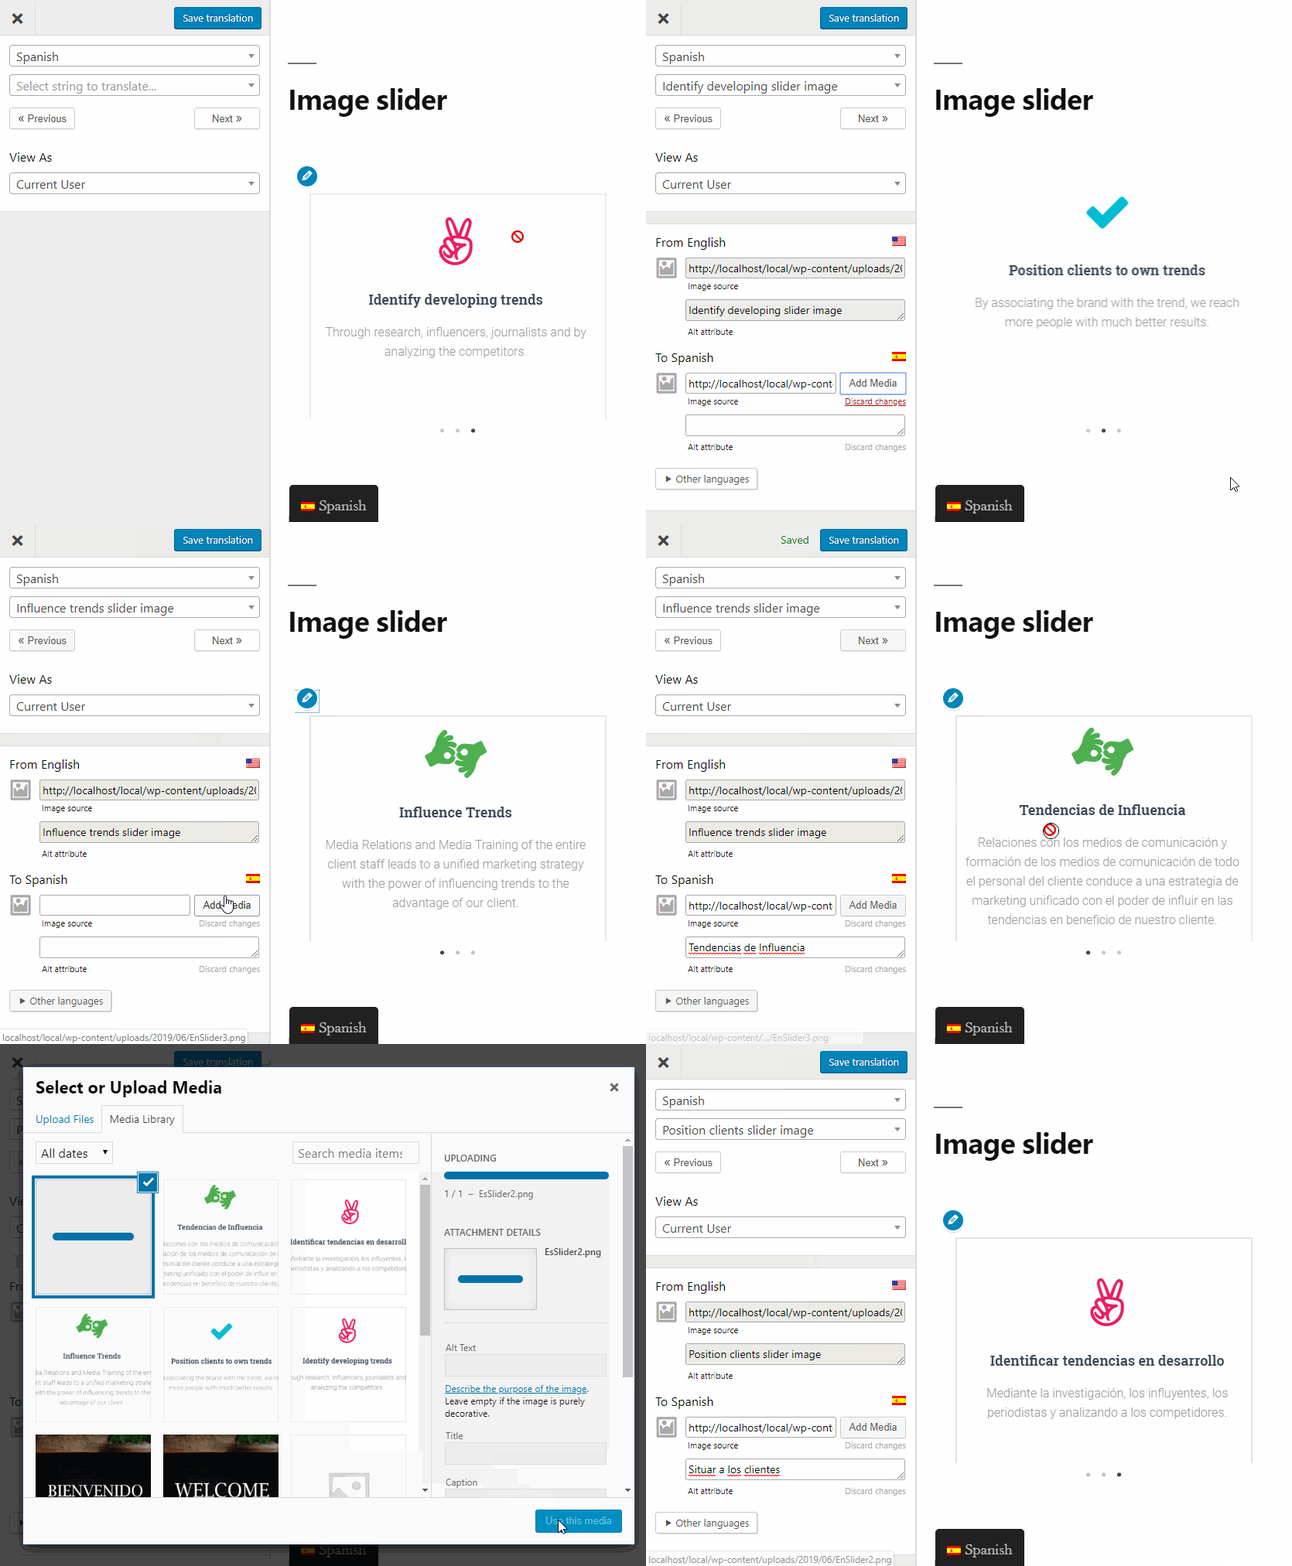
Note: To translate the alt attribute you will need the SEO Add-on which is only available in the paid versions of the plugin.
Translate links
Internal links are translated automatically by TranslatePress. All the page or post links within your site are translated to their version of the currently displayed language.
Custom internal links that are added directly to the HTML (without using PHP functions to construct them) are those added in the post content for example. These links can also be automatically translated by TP if the option Force language in custom links is set to Yes. This option is active by default and can be changed in Settings -> TranslatePress -> General tab.
What’s left are links to internal media such as images, documents or archive files, and external links. These can be translated manually from the Translation Editor interface.
Simply hover a link, click the button and translate the link. For each language you can either place the translated link or select a resource using Add Media button. This allows you to use the WordPress Media library to select an existing image, PDF or other files, or upload a new file.
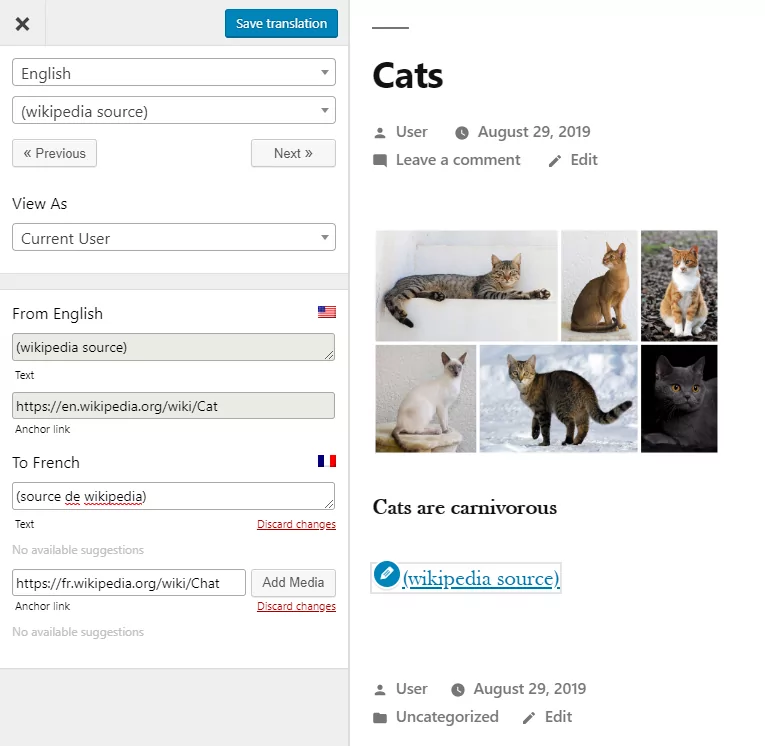
In this screenshot we have translated the external link of the Wikipedia article in English, to the French version of the Wikipedia article.
Basically we have translated the href of that anchor to point to another url.
Keyboard Shortcuts in Translation Editor
To speed up the translation process, you can use the following keyboard shortcuts in TranslatePress Editor.
- CTRL ( ⌘ ) + S – Save translation for the currently editing strings
- CTRL ( ⌘ ) + ALT + Z – Discard all changes for the currently editing strings
- CTRL ( ⌘ ) + ALT + → (Right Arrow) – Navigate to next string to translate
- CTRL ( ⌘ ) + ALT + ← (Left Arrow) – Navigate to previous string to translate
Translators can save time by using the keyboard to perform key actions instead of using the mouse cursor to click the corresponding action buttons.
CTRL ( ⌘ ) + S
Saving translations using this shortcut allows you to maintain your focus on the task instead of looking for the Save translation button.
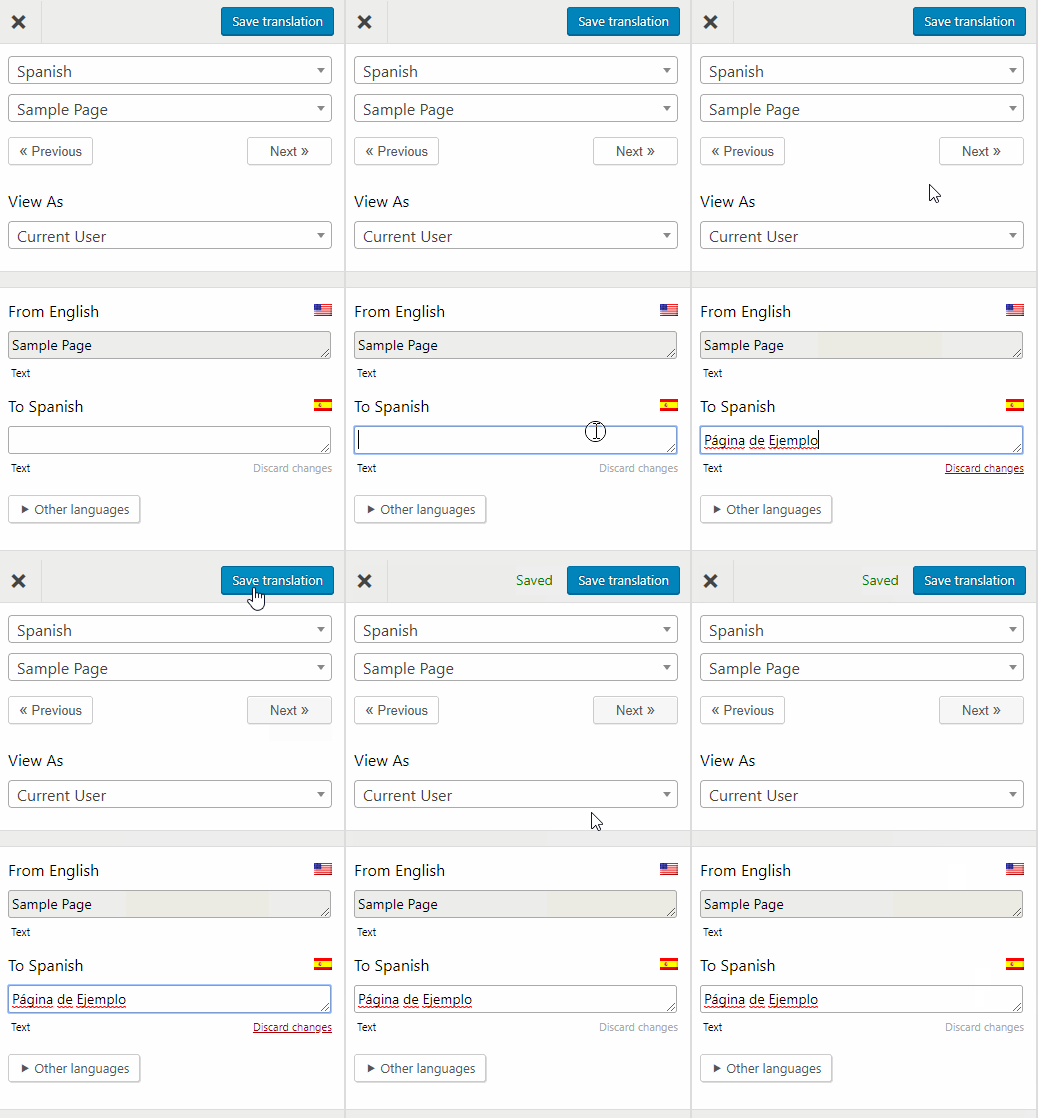
CTRL ( ⌘ ) + ALT + Z
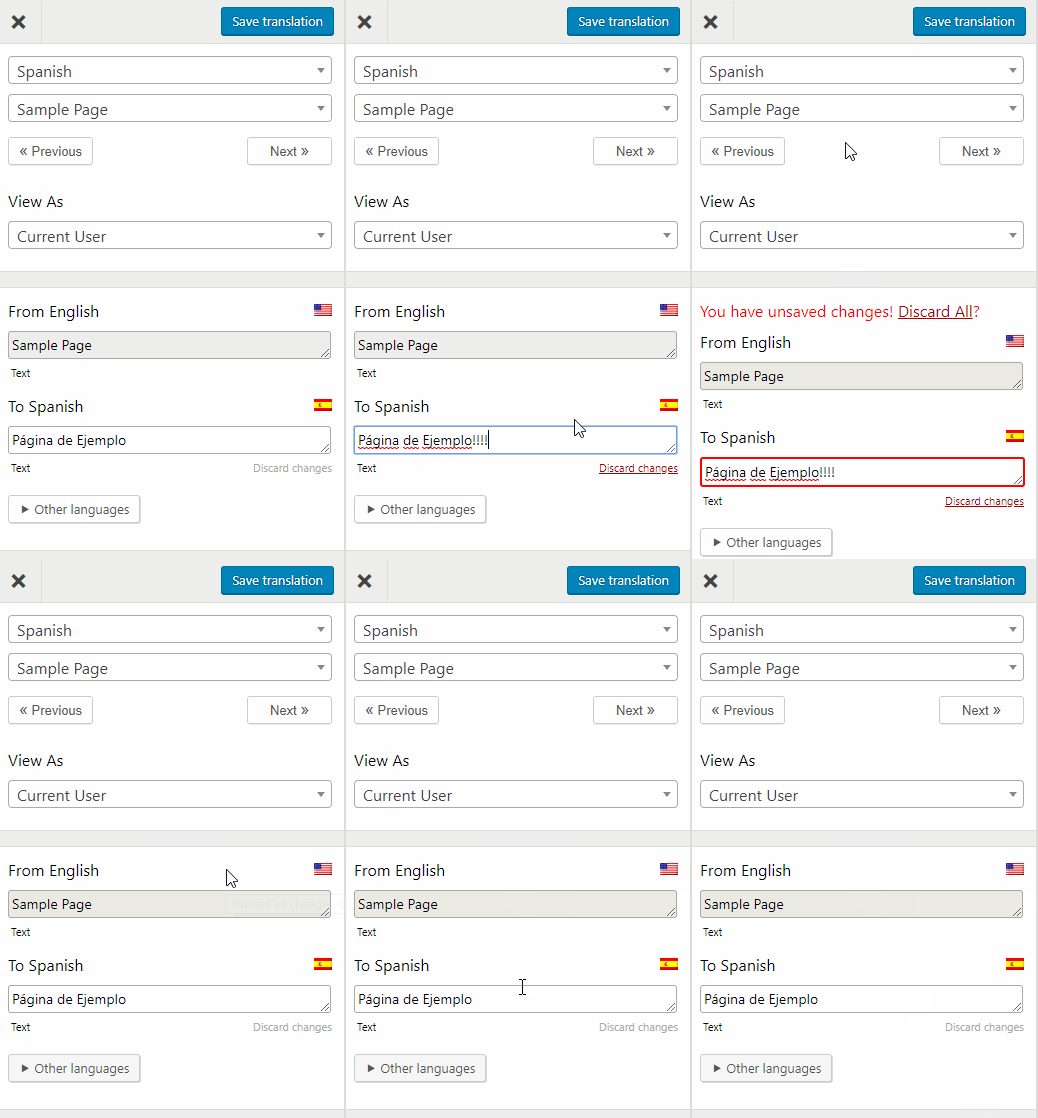
Discarding unwanted changes can be done much easier with this shortcut. This will Discard changes for the selected string and available meta information (such as title, alt or image source) in the sidebar, in all the languages.
CTRL ( ⌘ ) + ALT + ← (Left Arrow)
CTRL ( ⌘ ) + ALT + → (Right Arrow)
Navigate to next or previous string of the page using these two commands.
