Getting Started
Installing WP-Optimize Premium
- Download the WP-Optimize Premium from the link in your confirmation email, or from your account page here.
- After downloading the file, log in to your WP admin dashboard, then go to Plugins->Add New
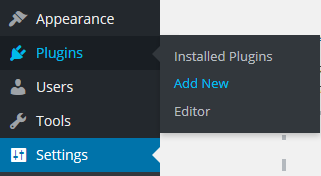
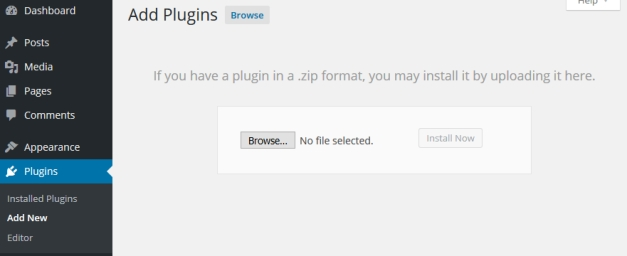
- …and then press the “Upload Plugin” button near the title at the top of the page… N.B. If your web hosting is configured with a small maximum upload limit, and WordPress says that the plugin could not be uploaded because it was too big, then you can first install this plugin, which extends WordPress’s plugin uploader with the ability to handle files above the configured PHP upload limit. Alternatively, you can install it manually instead: i.e., 1) Unzip the zip file on your computer 2) Use FTP to transfer the resulting directory “wp-optimize-premium” into wp-content/plugins (so that it becomes wp-content/plugins/wp-optimize-premium).
- After the plugin has uploaded, press the link to activate WP-Optimize Premium.
- If you have the free version of WP-Optimize already installed on your website, you don’t need to worry about anything as it will be automatically deactivated. You also will not need to install the free version to make WP-Optimize Premium run.
Optimizing your database
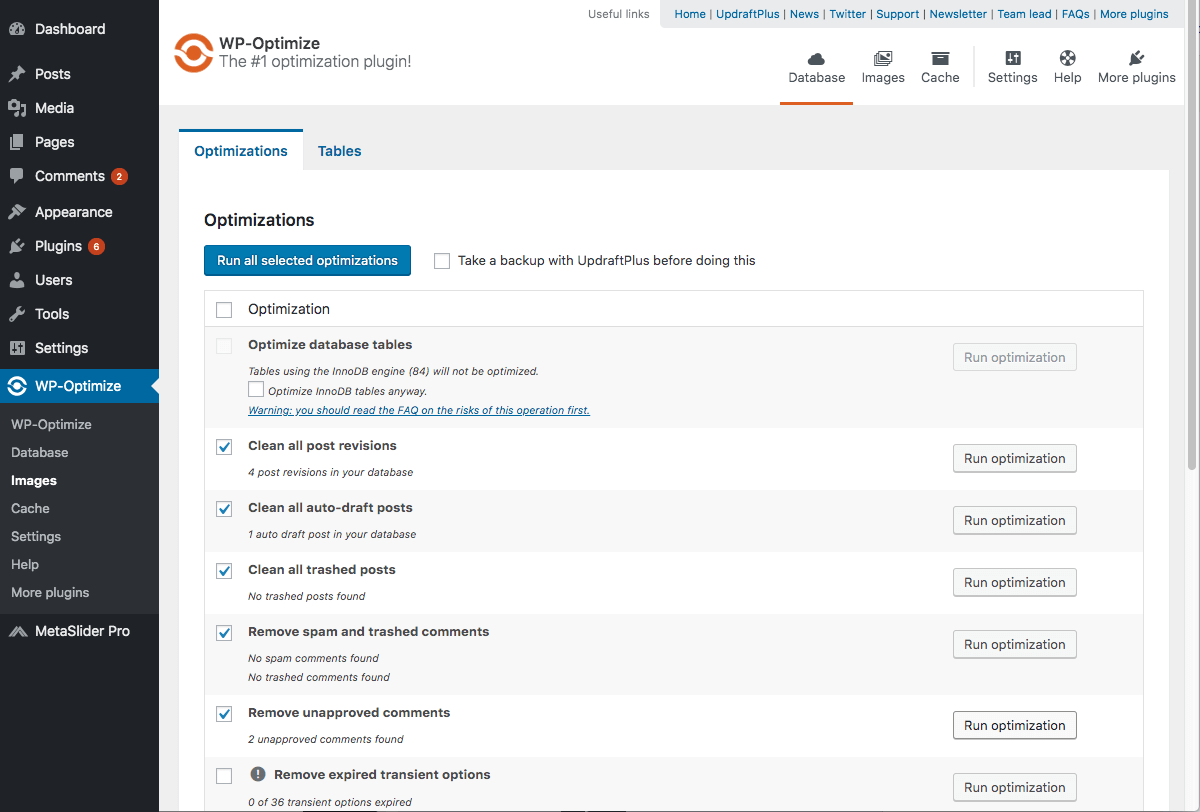
Go to WP Admin Panel » WP-Optimize » Database
- Click the ‘Run Optimization’ button to run any single optimization
- Check any number of optimization tasks and click ‘Run All Selected Optimization’
- View Table Information to see the record count and size for your tables
- View the settings tab to change the way WordPress Optimize will work and to schedule future (one off or regular) optimization tasks
Optimizing your images
a. Optimizing your new images
You have 2 solutions to optimize new images:
- Turn on automatic image compression
- Manually optimize images.
To Turn on automatic image compression, go to WP Admin Panel » WP-Optimize » Images. In the Compress images tab, turn on Automatically compress newly-added images To manually compress a single newly image, go to WP Admin Panel » Media » Choose the image to optimize » Edit more details » Compress image metabox » Compress (You can change the compression options if required).
b. Optimizing existing images (bulk)
To optimize your existing images, go to WP Admin Panel » WP-Optimize » Images. In the Compress images tab, scroll to Uncompressed images. Then select the images you want to compress, and press Compress the selected images.
Using custom image compression for different image sizes
v3.0.15 of WP-Optimize introduced the filter wpo_image_compression_single_image_options in order to give more control over the image quality.
Usage:
add_filter( 'wpo_image_compression_single_image_options', 'my_prefix_change_image_compression_options', 20, 4 );
function my_prefix_change_image_compression_options( $options, $attachment_id, $file_path, $size ) {
	// Set the quality to 80 for the full size images
    if ( 'full' == $size ) {
        $options['quality'] = 80;
    }
	// Set the quality to 51 for thumbnails.
	if ( 'thumbnail' == $size ) {
        $options['quality'] = 51;
    }
    return $options;
}
This example sets different compression levels for 2 different sizes.
Parameters:
$options: An array of options.
$attachment_id: The current attachment’s ID
$file_path: The file being processed
$size: The image size
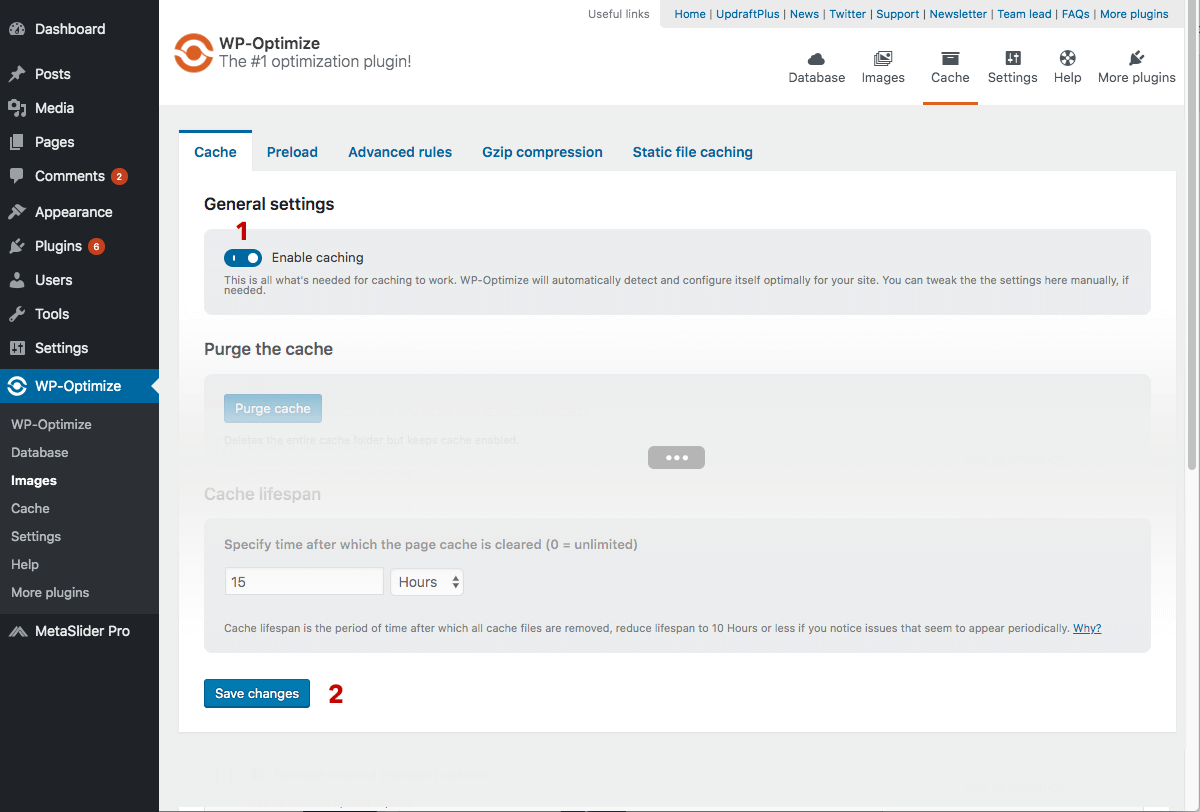
Caching your site
To enable page caching, go to WP Admin Panel » WP-Optimize » Cache. Enable caching, and save the settings.
That’s it! Your pages will start to cache.